Restaurant Unstoppable

valentines day restaurant tableFinding good resources for inspiration or direct support within the food and beverage industry can be difficult. There are websites and food publications like Saveur, Lucky Peach, and Bon Appetit that may have helpful ideas you can use. Restaurant books, chef memoirs, and exposés on the service industry can give perspective and ideas. Reality television shows like Restaurant Impossible, Top Chef, and Kitchen Nightmares can entertain and teach by example.

But it is face-to-face conversations with restaurant professionals that many in the food and beverage business lack the most. Thanks to the restaurant industry’s long hours, pace of business, and fierce competition restaurant leaders can easily get isolated from each other. Many restaurant pros rarely see fellow comrades, unless they run into each other at the same late night noodle shop or bar. And even then, we are frequently too exhausted to share quality resources or ideas.

Restaurant Unstoppable: The Pod Cast

Last week I was approached by Eric Cacciatore, creator of Restaurant Unstoppable, to be a guest on his weekly podcast. Restaurant Unstoppable is a weekly radio show that features industry professionals’ insights and tips on what it takes to succeed in the food and beverage industry.  I had to admit I hadn’t heard of Eric’s show, but I was intrigued by his enthusiasm and dedication to growing an online resource for restaurant professionals.

Restaurant Unstoppable is a place where restaurant people can share insights and ideas that can be accessed at any time of the day. Bravo! I like what Eric is trying to do, so I agreed to be interviewed. Who doesn’t want to be part of building something cool?

Eric sent me a rather detailed questionnaire before our interview. His questions about what it’s like being a hospitality consultant got me thinking about simple solutions I could share with people in the restaurant business.

Here are a few hiring tips I shared:

  • Smile when you interview applicants.  If the applicant is unable to smile, don’t hire them if they are applying for a front of the house position.
  • Have open interviews once a month, even if you don’t need people. It lets your current staff know how important doing great work is and it keeps you open to finding extraordinary people.
  • Pay great people more. When you find great people, pay them a little bit more than average if you can afford it. Even $.50 more an hour can go a long way in making a difference in the choices of barista or counter person. Paying more encourage great people not to go elsewhere.
  • Feed your team. Once you get a great team, make sure they’re fed. Offering a great staff meal can go a long way in making your food workers happy and perform well.

Continue reading “Restaurant Unstoppable”

Restaurant Stock

I may have started working in restaurants when I was 16 years old, but it wasn’t until much later that I began to learn culinary techniques I could use at home.  I can’t blame my lack of development on anything more than circumstance. I started in a small town in Massachusetts where the best seafood was fried or boiled, every restaurant kitchen had a microwave, hamburgers were unpacked as frozen beef patties, and iceburg was the only lettuce we knew.

Graduating from country club catering and seafood shacks, I began working in restaurants where the people in the kitchen weren’t summer help, the stainless steel counters were clean, knives were sharp, and saute pans and gas ranges cooked every dish to order.

The greatest lessons I’ve learned from the men and women of Los Angeles’ best restaurants is to pay attention to the little things. Simple fundamentals—cooking techniques, tools, and ingredients–create memorable food and extraordinary dining experiences.

One recent discovery came from my restaurant’s former chef, Evan Funke. I was inquiring about the minestrone soup we were serving. The flavors of the broth were so round and full of flavor, I was having a hard time believing the soup was vegetarian.

Chef Evan assured me that the minestrone was one hundred percent vegetarian. “The trick to the flavor,” he said, “is from sweating down onion and garlic, and adding Parmesan rinds to the stock.”

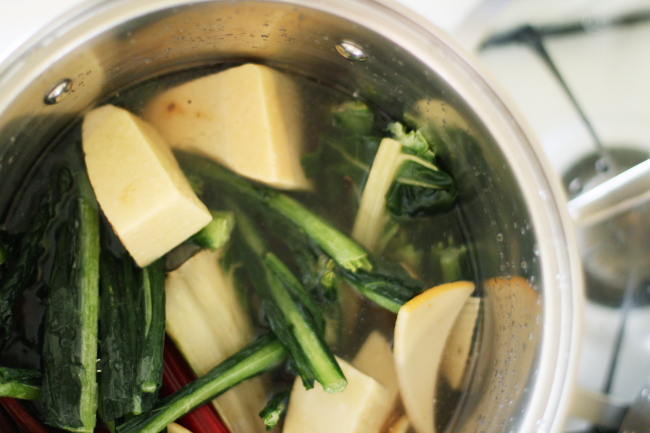
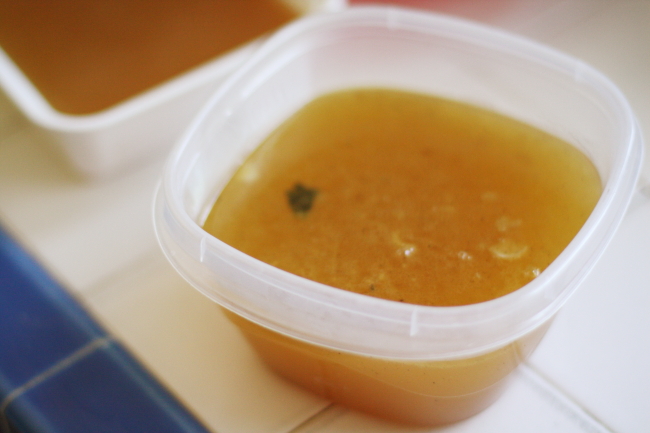
Soon after I decided to try out chef Evan’s trick. Rather than staying with a fully vegetarian stock I used left over vegetable scraps, a chicken carcass, and a tupperware filled with handful of leftover Parmesan ends. What resulted was the most flavorful, golden broth I have ever had the pleasure of making in my kitchen.

What kinds of tricks have you learned along the way that have made all the difference?

[print_link]
Easy stock
I always make stock the day after I roast a chicken. Now that I’m adding Parmesan rinds to the base of the broth, things are really getting tasty. You don’t need to use chicken or any meat (for that matter) to make tasty stock. The key to making a flavorful stock super is to collect your vegetable scraps over a week’s time,  keep them in the freezer in an airtight container, and add as many rinds of hard cheese as you have!

Frozen vegetable stems, tops, skins (carrots, kale, potato, etc.)
Chicken carcass and bones*
Hardened Parmesan rinds

Place the chicken bones and vegetable stems in a pot. Fill the pot with cold water, just until the chicken and most of the vegetable scraps are covered. Do not fill the pot to the top with water. The less water you use, the more flavorful the stock. Turn to high heat. When the stock comes to a boil, immediately turn down to a simmer. Simmer for at least 45 minutes to an hour. Taste. Season with salt and pepper. Strain and pour into small containers. Let cool. Freeze what you can not use within 3 days.

*Chicken carcass and bones are optional! Remove for a fully vegetarian stock!


Cook Like a Chef, Even if You Don’t Know One

Knowing where to look for culinary answers is key to cooking a great meal

Not every food lover has the opportunity to turn to a celebrated chef for help whenever they have a food question. That’s why I treasure the fact that my job as a server and bartender puts me in the proximity of some of the most chefs in Los Angeles.

Though I may not cook like an award-winning chef, I certainly want to. For that reason alone, I never take the blur of activity in the restaurant’s kitchen for granted. As I pass by the busy stoves on my way to the dining room, I snatch mental snapshots of the day’s prep: the way a prep cook measures out a perfect portion of pasta with a scale, how another slides his sharp knife through the belly of a fish, and the way a pastry cook zests a lemon with confident strokes.

Whether or not the brigade in chefs’ whites is aware, these men and women are my culinary mentors. When a recipe stumps me or a particular ingredient poses too much of a challenge, I bring my culinary conundrums to the people I trust the most. Because chefs know how dough should feel, the way to combine simple flavors and make them sing, just which spice will make a dish come alive, or how to thicken a sauce so it clings to a protein like a mist rolling over a hill.

Unfortunately, it seems like the moments when I truly need a chef’s expertise is when I’m alone at my home stove or at the farmers’ market with a head full of uncertainties.  Though I work for Nancy Silverton, I’m not about to call the busy chef with a question about lamb shanks*. So how does a home cook find their way in the kitchen? Here are five simple ideas to get you closer to cooking like a chef.

Continue For Five Tips to Get You Cooking Like a Chef »

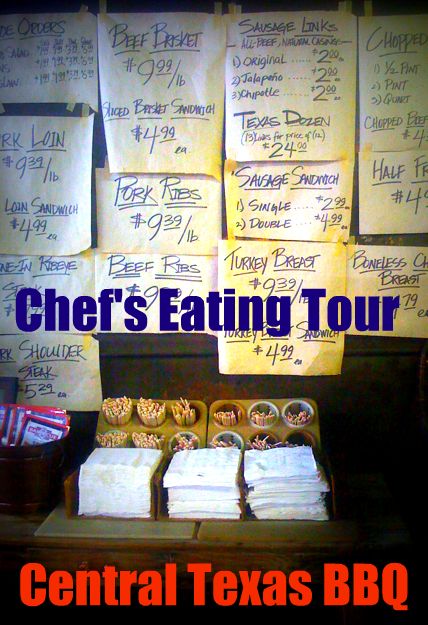
Chef’s Eating Tour: Central Texas and Hill County Barbecue

Author’s Note: Today’s inaugural guest post is from Chef Erik Black, of Osteria Mozza. We look forward to sharing with you his five-day eating tour of BBQ through Central Texas and Hill County. So save your pennies and start working out, because this is one eating tour that you will most certainly want to commit your belly to. Completely.

Continue For Erik Black’s Complete Chef’s BBQ Eating Tour of Central Texas and Hill County Barbecue »

Guest Post: Chef Erik Black of Osteria Mozza

I am very excited to announce the first-ever guest post here at Food Woolf. Next up, a Chef’s Eating Tour from Chef Erik Black of Osteria Mozza!

Chef Erik Black may call himself a humble student of meat, but as far as I’m concerned, the guy is a master. During his long days in the kitchen of Osteria Mozza, the former Massachusetts native coaxes subtle and robust flavors from diverse cuts of meat. He braises beef until it’s fall-off-the-bone tender and creates delicacies from a massive pig’s head or its much-neglected trotters. He cures sides of pork until it becomes silky and soft and tastes like a prayer. He slow cooks oxtail to the point that the chocolate brown meat becomes as soft as oatmeal and tastes of the earth. He crafts succulent sausages from rabbit loin and fresh herbs.

In my world, Erik is an authority. He is the one to talk to when making pork, testa, braised beef, short ribs, barbecue ribs, rabbit sausage, and smoked meats—because he knows how to celebrate the life of every animal he cooks. Erik is a soft-spoken master that rarely steps out of the kitchen. But come into Mozza on any given night, and you will see unmistakable signs of Erik’s talents—there’s his Copa, testa, mortadella, lardo, and barbeque ribs–peppered throughout the menu.

So when I heard Erik say he was planning to take a tour of Texas Barbeque joints, I made a point of asking for lots and lots of details.  Lucky for us, Erik went one step farther, and decided to give us a five-day guide for an ultimate Texas Barbeque Tour.

Coming soon, Chef Erik’s Eating Tour of Central Texas and Hill County!

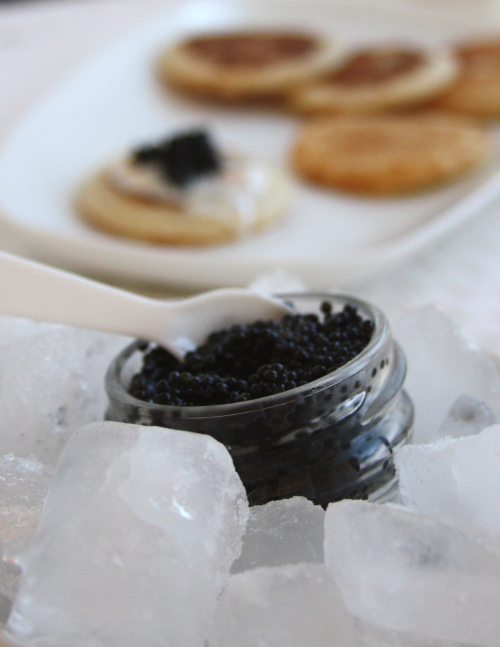
New Year’s Culinary Tradition: Caviar

New Year's caviar

Culinary traditions are handed down, borrowed and created.  I bake my grandmother’s Finnish Nisu (cardamom sweet bread) at Easter and Christmas. Favorite chefs and images like Norman Rockwell’s Thanksgiving influence my Thanksgiving day spread.  Now that I’m married and living thousands of miles from my bi-coastal family, I find I need to create new culinary traditions to celebrate my life with the man I love.

Since New Years is a working holiday for most restaurant industry folk, I’ll be saving my celebrating for the next morning. As many in Los Angeles wake with new-decade hangovers, my husband and I will be enjoying a celebratory morning with caviar and a bottle of bubbly.

Continue Reading for a Simple New Years Recipe for Caviar! »

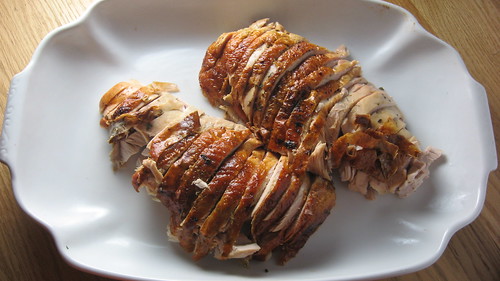
Where To Buy Turkey in Los Angeles

thanksgiving dinner 2008

I’m not sure how it happened, but I completely forgot to order my Thanksgiving turkey. My husband snapped me out of my ignorance of current calendar dates last night. He was gentle, but pointed.

Chef Quinn ordered his turkey from Harvey Gus,” he said. “Maybe you should see if it isn’t too late to get a turkey.”

I gave him a blank stare. Wait. Get a turkey? How many days do I have before Thanksgiving?

That’s when I realized I was in trouble. As I scrambled to do research on where to find a bird, I realized I was in one of those concurrent life/food blog  moments. If I were to get anything out of this potential debacle, I would have to write about it.  Fast.

Based on my research, I offer you this roundup of Where to Buy Turkey in LA (Last Minute).

To get the Inside Scoop on Where To Buy a Turkey in LA »

A Seafood Recipe–Inspired by an International Fish Market

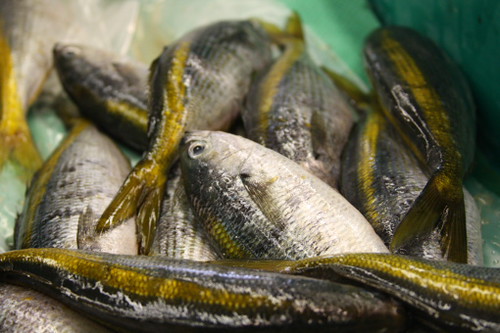
fish at IMP, Los Angeles

The alarm went off at 6 AM—an uncharacteristically early wake up call for someone who waits tables past midnight. Eyes hazy from a lack of sleep, I stepped into the warm shower with dreamy thoughts of an early visit to an unfamiliar downtown market. Soon there would be coffee. And fish. Lots of fish.

International Marine Products

The day started early at International Marine Products (IMP), a small but world-class fish market open to restaurant professionals only. On the fringe of downtown Los Angeles, chefs from LA restaurants don hairnets or baseball hats while perusing the diverse selection of ice packed fish, mollusks, and shellfish.

brian and bass

Continue Razor Clam recipe »

An improvised recipe for Maryland Crab soup


(Photo credit: from Diane at White on Rice)

There’s something really beautiful about having the confidence and skill to improvise. Musicians do it when they see beyond the black notes on a chart and close their eyes to jam. It’s the same with creating something impromptu in the kitchen; it comes when the cook understands more than just the basic chemistry of cooking and ratios and starts to feel their way into a never-before-created dish.

Like a musician that can hear a tune unwind in their head, a chef must be able to cook and taste a dish before ever slicing into product or turning on the stove. The day I cooked crab soup from beginning to end without ever boiling a pot of water, was the day I realized I had started to think like a chef.

Take me to the bridge!

I have my friend Chef Brian—sous chef of Hatfield’s restaurant–to thank for my recent transformation. Over the past year he’s taken me under his wing, described the way he creates dishes and has talked me through the way prepares every ingredient. Thanks to his willingness to share culinary secrets, he’s given me information that can only learned by spending thousands of hours in the kitchen.

I recently invited a handful of my very best culinary friends to our Los Angeles apartment for a night of eating. I couldn’t think of a better way to celebrate our love of food than with a casual dinner that celebrated the bounty of California’s farmers’ market featuring freshly caught Santa Barbara crab. With the Hungry Cat Crab Fest–one of my favorite LA dining events–as inspiration, I began to put together my menu.

Standing in the Hollywood Farmer’s Market I saw it all so clearly. I would serve a multi course dinner, starting with a cucumber and lime cocktail. I’d begin with a savory fruit salad (Suzanne Goin style), follow it with a Maryland-style crab soup and corn bread, and finale with a huge Santa Barbara rock crab, mallets and plenty of corn on the cob. I felt confident about the salad and the simple boiling of the crab and ears of corn–but the soup was a different matter completely.

I didn’t have a recipe, nor any hope of finding one. I asked my boss (Suzanne Goin herself) if she had a copy of her husband—Chef David Lentz‘s—soup recipe but she didn’t. Oddly confident I thought, I can figure this out.

I began to doubt my abilities the moment after I had navigated through the crowded Hollywood Farmers Market with bags stuffed full of fresh produce and angry Santa Barbara crabs. Suddenly my mind was flooded with an imagined future of disappointed food bloggers politely eating a watery crab soup.


Just as I was at my lowest low, the culinary gods smiled upon me as I stumbled across the path of smiling Chef Brian—a Maryland native and crab expert.

“My god,” I gasped. “Can you tell me how to make crab soup?”

With my hands occupied with heavy sacks, he ran down the basic procedures of preparing a Maryland crab soup. Unable to take notes, I visualized the cooking of the crab, the messy job of pulling out the crustacean’s sweet meat, the sautéing of the shells and cooking the bodies down with mirepoix to create a rich stock. I saw it all as I repeated the steps all over again at the stove. Thanks to Brian’s advice and my newfound confidence, the soup was a huge success.

Like a family recipe that is shared through generations, this soup is created by feel and instinct. I offer you the recipe here, as it was described to me at the Hollywood Farmer’s market.

[print_link]
An Improvised Maryland Crab Soup
As shared by Brian Best, Hatfield’s Restaurant

4 large Santa Barbara Crabs
1 large bunch of carrots, peeled and chopped
1 large bunch of celery, chopped
3 large onions, chopped
6 ears of corn
fingerling potatoes (1-2 pounds), peeled and chopped into small pieces
2 small cans of tomato paste
2 dried ancho chili
2-3 tbl Harissa from a tube
Vegetable oil for cooking
Olive oil for cooking
enough water to cover the crabs
left over vegetable scraps or herbs

Crabs should be alive before you cook them. Leave crabs in the coolest section of the refrigerator until you are ready to cook them. Putting them in the freezer for 10 minutes before you cook them will make the cooking process less difficult for the crabs (and you).

Fill a large pot with water. Bring the water to a boil. Add the crab one at a time to make sure they are fully submerged in the water. Cook separately if necessary. Depending on the size of the crab, cook for 12-15 minutes but no more. Remove the crab from the water, let cool. Reserve the cooking liquid if possible.

Cover your worktable with newspapers. This is going to be messy. Using a mallet, hammer, or crackers, break the claws to reveal meat. Using chopsticks or picks, remove the meat. Put crab meat in one bowl and the shells in another. Rinse crab’s top shell of the dark internal liquid, as this juice will make the soup bitter. Break down the top shell with a hammer.

Using the same large pot, heat pot over high heat with a little vegetable oil. Add an acho chili or two, the crab shells and pieces. Stir crab shells frequently, making sure to heat all the shells evenly. The crab shells should start to smell of the sea, about 10-15 minutes.

In a separate pan, add half of chopped onion, carrot and celery to a hot pan with olive oil. Sautee down until the mirepoix ingredients begin to soften. Add to the sautéing crab shells. Add herbs and any vegetable scraps you may have. Add cooking liquid or water to the crab shells, being careful to add just enough to cover the shells. Simmer on stove for an hour. Taste. Drain the crab stock with the finest sieve you have. Cook down the stock for 30 minutes to an hour.

In your sautee pan, cook down the remaining mirepoix ingredients until soft. Add softened mirepoix and potatoes to stock. Remove the corn from the cob and add to stock. Add tomato paste, stir to dissolve. Add crab meat. Cook down for 30-60 minutes. Taste for seasoning. Add Harrissa if you desire more spice. Serve immediately or freeze.

Serve with cornbread.

Chef Suzanne Goin’s Savory Fruit Salad Recipe

recipe inspired by Suzanne GoinI love eating salads, don’t get me wrong. But when it comes to eating out, I skip the leafy greens for the instant gratification of ordering a complex entrée that takes just minutes to come to the table, rather than hours of preparation at home. When I go out I want to have fun. When I’m home I want to keep it simple.

Once outside of the restaurant–be it the one I’m working for or dining at as a customer–I find myself craving simple dishes. I long for perfectly composed salads and uncomplicated appetizers that I see service after service as I wait tables at Tavern.

Thanks to my job as a server for Nancy Silverton, I craved Italian antipasti for years. But now that I work at a new restaurant, I find my cravings are colored by the seasonal whims of my new boss, Chef Suzanne Goin. Her food is rustic, Provencal and thoroughly inspired by the market. Go to the market and it becomes clear why a warmed heirloom tomato, a crisp plum, the lingering flavors of a basil stem could inspire entire dishes on Suzanne’s menu. Her dishes reflect California’s bounty and an unabated passion for great ingredients.

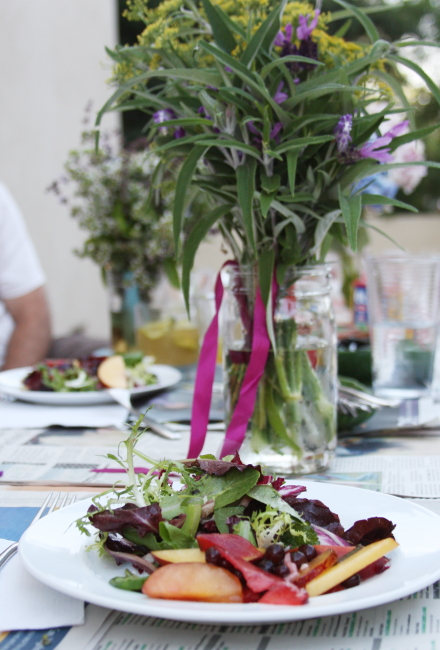
A recent culinary revelation was recently delivered to me via a white plate at pre-service (a daily meeting before dinner service begins). Suzanne described the dish as a fruit salad. More savory than sweet, one perfectly balanced bite made it was clear this was no ordinary fruit salad. Suzanne’s greens were lightly tossed with vinaigrette—ingeniously made with left over basil stems and not-so-perfect plum pieces—and studded with just ripe stone fruits and Marcona almonds.

I’ve been craving it every since. This is my interpretation of her recipe, as prepared for my friends on a recent hot summer’s day. I omitted the nuts, but you can add those back in.

[print_link]Suzanne’s Fruit Salad

1 large bag of mixed greens
1 head of radicchio
1 head of frisee
3 large plums, dark purple and heavy with juice
2 large peaches
2 large nectarines
2 small Geo plums (or a tart, crisp varietal)
1 small bunch of grapes
4 branches of thyme
2 branches of basil
3 oz. red wine vinegar
1/3 cup extra virgin olive oil
1 small tangerine, juiced
salt and pepper

To prepare the plum vinaigrette:

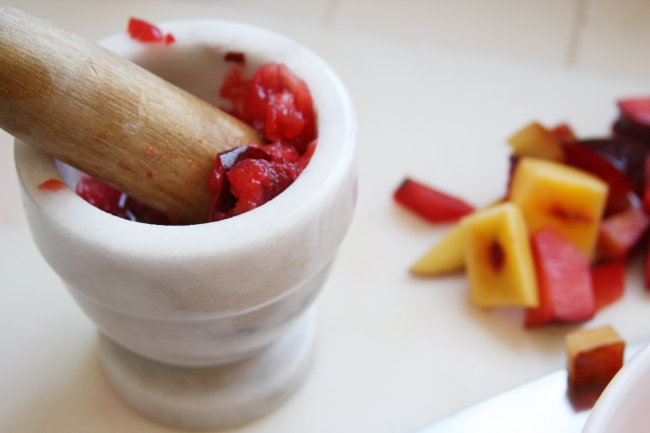
Staying close to the seed, slice the stone fruit so that you have two perfect rounds per fruit. Slice the fruit “cheeks” into consistent sized slices. Set aside.

Cut the remaining fruit off the seed of each fruit, being careful to save the uneven pieces for the vinaigrette. Place the random pieces into mortar and crush, being careful to extract as much fruit juice as possible. Put the pulpy juice into a small bowl and add the olive oil, vinegar and tangerine juice. Remove the basil and thyme leaves from the stem. Muddle the herbs’ leaves and the basil stem in a mortar and pestle. Add to the vinaigrette, stir and taste. Add salt and pepper. Taste for balance. Add more acidity (in the form of more red wine vinegar or lemon juice) or seasoning if needed. Put in a jar and let sit for a few minutes. When ready to toss the salad, remove the basil stems.

To prepare the salad:

Chop the radicchio into small slices. Chop the bottom off the frisee and pull apart into individual pieces. Toss the radicchio and frisee into the greens. Toss the fruit with some of the plum vinaigrette in a separate bowl. When ready to serve, toss the greens with the plum vinaigrette, using the least amount necessary.

To compose the salad, place a heaping tablespoon of dressed fruit on a chilled plate, then top with greens. Add pieces of the fruit on top, being sure to drizzle some of the juice over the top of the final salad.

Think Like A Chef: Quinn Hatfield

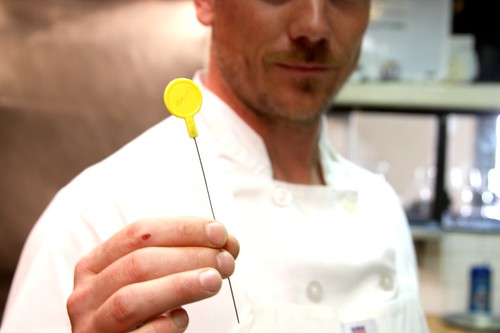
cake tester from Quinn Hatfield

I’m lucky to have chefs for friends. It’s one of my most favorite benefits of working in the restaurant business. Not only are professional cooks really entertaining to hang out with* they also are invaluable resources when it comes to anything culinary. And, if you ask nicely and aren’t afraid to embarrass yourself, chefs have lots of great insights on cooking techniques, recipes and how to improve your performance in your home kitchen.

Chef Technique
mise 1

In order to cook like a chef you have to think like one. In a professional kitchen, cooking isn’t done on a whim. Everything is thought out in advance and prep–small tasks like shelling beans, peeling potatoes and making stock–is done before the first diner ever walks through the restaurant’s front door. The chaos of a busy kitchen is powerful enough to ruin any chef–regardless of their training and stature–if they haven’t properly organized, planned and maintained great technique.

Thanks to several recent off-the-clock visits with the chefs of Hatfield’s restaurant, I’ve been able to pick up a lot of great ideas I frequently use at home. Beyond learning about the best inexpensive kitchen tools, I’ve also been able to pick up some key cooking techniques. The following recipe is a great example of how learning an invaluable and time-tested cooking technique can make cooking at home so much easier.

Thanks to the generous guidance of my Michelin starred chef friend, Quinn Hatfield, I now am pretty certain how he makes Alaskan halibut taste so good. This recipe is a slightly modified version of a dish I recently tasted Hatfield’s.

Alaskan Halibut can be sublimely sophisticated when good planning, preparation and technique are employed. Advanced prep is the key to creating this elegant entree without ever breaking a sweat.

Before you start, read the recipe through from beginning to end

Rather than cook as you go, think about meal preparation as a two part process: prep and then cooking. Preparing dish elements in advance is an adjustment, but with all the chopping and complicated busy work taken care of in advance, there’s a lot less stress in the kitchen at dinner hour.
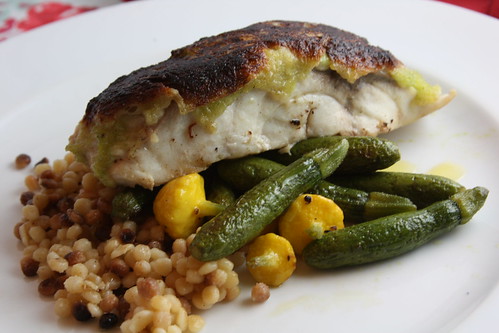
Hatfield's at Home

[print_link]
Crusted Alaskan Halibut with Shrimp Mousseline and Spring Vegetables**
Makes 4For the fish:
4-6 oz. halibut fillets with skin removed (Check for pin bones. Remove with tweezers, if necessary)
1 small loaf of brioche (to be frozen in advance of prep)
shrimp mousseline (see ingredient list below)
parsley butter (see ingredient list below)
Maldon sea salt

for shrimp mousseline
8 medium to large shrimp, with shells removed and de-veined
¼ cup heavy cream
1 small clove of garlic

for parsley butter
6 tbsp of butter, room temperature
¼ (heaping) cup of parsley leaves (removed from stem)
1 small clove of garlic
salt and pepper

Spring vegetables

3/4 lb of mixed spring vegetables (baby carrots, baby zucchini, baby pattipan squash)
6 sprigs of thyme
4 tbsp butter or olive oil
salt and pepper
Maldon sea salt

Tools needed: metal cake tester, wax paper, pastry brush, steamer, mini-Cuisinart (or blender), mandoline (inexpensive plastic version can be found at Asian markets or at cooking stores like this.

Mise-en-place (can be done several hours in advance):

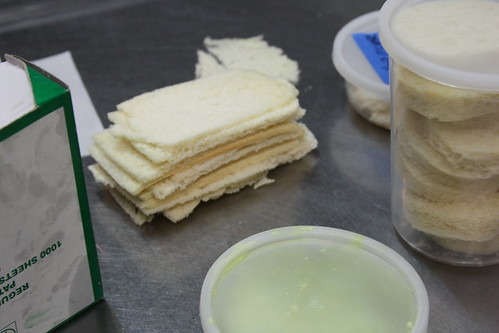
Cut brioche in half. Freeze the bottom half and save the rest for another use. When the bread is completely frozen, remove the crust and slice the bread into rectangular strips that mirror the shape of the fish fillets. Keep in mind you will only need to slice enough bread to create a single layered “crust” for each fillet. Slices should be no thicker than 1/8th of an inch. Line a sheet tray with a sheet of wax paper then add the brioche in a single layer. Cover with clear plastic and refrigerate.

To make the mousseline:
Place the cleaned shrimp, cream and garlic in the bowl of a mini Cuisinart. Purée until mixture is thick like a paste. Remove from bowl with a spatula and refrigerate in a covered container.

To make the parsley butter

Clean the Cuisinart’s bowl. Add butter, picked parsley leaves and garlic. Purée until smooth. Temper the butter over a low heat in a small saucepan or non-stick pan. When tempered, remove the brioche slices from the refrigerator. Spread parsley butter onto one side of bread. Flip the bread (butter side down) on the wax paper. Save remaining scallion butter for bruschetta or buttering bread.

Fish prep:

Spread a thin layer of mousse on the fish with the back of a spoon. When finished, salt and pepper both sides of the fish. Using the shrimp purée as a sort of glue, flip the fish (mousseline side down) onto the unbuttered side of the brioche bread.Cover with plastic wrap and refrigerate until ready.
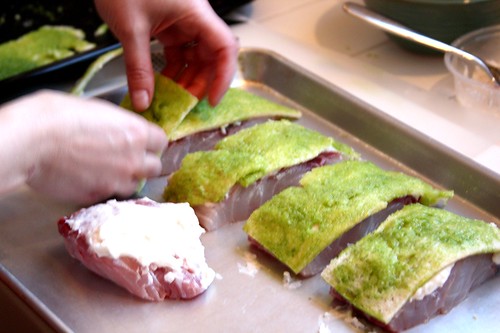
composing the fish

45 minutes before serving time:

Remove sheet tray with prepped fish. Carefully flip the fish so that the wax paper is top side up. Cut around the wax paper so that each fish has wax paper covering its bread crust.

Add several inches worth of water to a pasta/vegetable steamer. When steamer has begun producing steam add the prepared fish, keeping the covered crust facing up. Do not crowd the fish. Crack the lid with a spoon, making sure the lid is tilted at an angle—otherwise the condensation will make the bread soggy.

Let the fish steam for 20 minutes. Carefully remove one piece of fish with a spatula. Using the cake tester to check the done-ness of the fish, insert the thin metal pick into the fish horizontally so that the tester hits each of the fish’s internal segments. If you feel the ping-ping-ping of the connective tissue, the fish will need more time to cook. Return to steamer. When the cooking is complete, the connective tissue will be buttery smooth and can not be perceived by the cake tester method.

Meanwhile, heat a small sauté pan over a medium heat. Add butter and, when melted, add the spring vegetables (if cooking carrots, add first before softer vegetables). Sauté until just soft. Add a sprinkling of thyme, salt and pepper. Taste and adjust for seasoning and cooking temperature. Remove vegetables.

When fish is finished steaming, add a generous tablespoon of butter to the warm sauté pan. When the butter has melted, carefully add one or two of the fish fillets (breading side down) to the pan. The point here is to quickly brown the bread, no more than 30 seconds to a minute. Carefully remove the fish and place on a warmed plate. Repeat with the other two fillets.

Spoon vegetables on the side of the warmed plates. Sprinkle the fish with Maldon sea salt and serve.

Should you decide to host a dinner party and skip going out for dinner altogether (despite the fact that there are plenty of restaurants out there willing to slash prices to get you in the door), this Alaskan Halibut is an excellent choice for maintaining calm in the kitchen as your guests arrive.

*Chefs are like pirates: they like danger, work odd hours, enjoy free time with an undeniable vigor, have fascinating stories to share and fire and sharp steel are their friends.

**This photo shows this dish made with Fregola sarda (a round pasta that resembles cous cous). I chose not to include prep for the pasta so as not to overwhelm!
Butternut Squash Gratin, 2009 Revisited


If a face can launch a thousand ships, what power could a butternut squash have? Turns out one baked butternut squash from Tuscany topped with melted sheep’s milk cheese had the power to change my life.

Flash back to more than a year ago. While on my honeymoon in Italy, my newly minted husband and I stopped for a late lunch in the town of Montepulciano at a tiny restaurant named Osteria Aquachetta.

Among the many Tuscan dishes we sampled, it was a simple side of fresh-from-the-hearth butternut squash with melted sheep’s milk cheese that made us return for dinner several hours later, only so that we could taste the contorni again. The flavors of sweet, caramelized squash united with the oozing, nutty and tart layers of sheep’s milk cheese in a combination of flavor so powerful, I found myself reconsidering everything I knew about food.

Quite simply, when I took that first bite of butternut squash gratin, I saw God. As I relished in the simplicity of the dish—the tender orange meat layered with gooey rounds of sheep’s milk cheese–I could see in perfect detail just how lucky I was to be alive, to be in love, and to be eating as well as I was. In this culinary aha moment, I knew that my time had come to use my craft as a writer to document each and every great meal.

A FOOD WRITER IS BORN

After that fateful meal, I returned home with a new perspective. For the first time I could remember, I began thinking about food as an art form I could master. I put away my novels and began reading cookbooks. I studied the knife skills and cooking techniques of the restaurant’s chefs. I took note of every prep cook’s secrets (like how they de-boned salted anchovies under a steady stream of cold water). I mustered my courage and asked my culinary hero (and boss), Nancy Silverton, for detailed culinary advice about how to perfect this recipe.

After multiple attempts, I settled on a simple recipe with good ingredients that proved to be as close as I could get to the original dish I sampled at the Osteria Aquacheta. I posted the recipe on my newborn blog and moved on.

photo by White on Rice

Since posting that first recipe in November of 2007, a lot has changed. I cook differently. I make meals with confidence. I cook with growing understanding. Cookbooks are my friends but not my sole confidants.

The following recipe is a tiny reminder of all the things I learned in 2008. Where I once was stymied by a lack knowledge, I now have the vocabulary and a growing skill set to know where to look for answers. Though I may still be a padawan learner, I am on the right path.

My updated Butternut Squash recipe has texture and another layer of sweet, nuttiness from fresh pistachios. The crunch of breadcrumbs, the sweetness of the squash, the salted nuttiness of the sheep’s milk cheese and the unifying flavors of the pistachio nuts makes this dish my favorite dish of 2009.

photo by White on Rice

[print_link]
My 2009 Butternut Squash Gratin

Find the longest necked butternut squash you can find for this recipe. Reserve the seed-holding cavity of the squash for another use.

2 Butternut Squash necks, cut into 3/4 inch rounds
½- lb Pecorino Fresca, cut into ¼ inch thick slices. (Idiazábal, a Spanish hard cheese made from the milk of the long-haired Lacha sheep is a good substitute. Grate, if the cheese is too hard for slicing)
½ cup olive oil, with extra for drizzling
½ cup home made bread crumbs*
1/4 cup chopped pistachio nuts
Maldon sea salt, to taste
Freshly ground pepper, to taste

Preheat oven to 375. Peel the squash, cut into uniform rounds. Toss the butternut squash with oil in a medium sized bowl, making sure to coat the rounds with oil. Arrange the squash rounds in a medium-sized casserole dish, allowing for some layering. Pour the remaining oil over the squash. Bake in the oven for approximately 30 minutes, or until the squash is tender enough for a fork to pierce the meat, but not buttery soft. Remove from oven and set aside to cool. This step can be done in advance.

Once the squash is cool enough to touch, begin layering slices of cheese between the rounds of the butternut in the casserole dish. For individual portions, stack two or three butternut squash rounds on top of each other with layers of cheese in between.

When finished layering, sprinkle the entire dish with bread crumbs, then top with the chopped pistachio nuts. Drizzle lightly with olive oil to moisten the breadcrumbs. Finish with a sprinkling of Maldon sea salt and black pepper. Bake at 375 for another 10-20 minutes, or until the cheese is melted and the squash is soft.

If you desire, turn the oven to broil to caramelize the top of the gratin. Put under the flames for just 2-3 minutes. Serve. Add additional seasoning or red chili flakes if spice is desired.

*Grind left over bread (or toasted fresh bread) with a food processor until a mildly course texture. Add 2 tablespoons of chopped parsley and a hearty pinch of Malden sea salt. Toss. If bread is soft, spread onto a cookie sheet, drizzle with a touch of olive oil and toast in oven (250-300°) until a light, golden brown. Store extra breadcrumbs in an air tight container.

Squash Blossoms at Home

Fried Squash Blossoms
One of the great things about working at a really good restaurant is watching great food get made. One of the frustrating parts of working at a great restaurant is being around food for eight or nine long hours and never getting to eat.

The following dish is one of the signature appetizers of the restaurant I work at. Whenever an extra dish is “fired” (cooked) or doesn’t meet the chef’s standards, there’s a chance that the dish will be apprehended by a scavaging staff member ready to snag a quick bite, before the dish’s contents gets tossed.

This weekend’s farmer’s market was crowded with beautiful examples of squash blossoms, just begging to be made fresh.

There are two forms of squash blossoms available at local farmer’s markets from . When at the market look for squash blossoms that are either “unattached” (the male flowers) or the small blossom attached to a baby squash (the female flower). Either kind of blossom will require the removal of their internal “organs” (the pistil or the stamen) before they can be stuffed. The flowers are delicate and quick to go bad, so be sure to use the flowers right away.

I made this dish with fresh Buffala ricotta, which can be found at Bubalus Bubalis’s , the Hollywood Farmers market and a number of other cheese stores across the country. The taste and texture of this cheese is amazing but a fresh cow’s ricotta cheese will do.

Fried Squash Blossoms
Ricotta stuffed squash blossoms
A simple appetizer for two

For the blossoms
1 ½ cups of fresh buffalo ricotta or cow’s milk ricotta
pinch of salt
Freshly grated nutmeg (to taste)
Six (or more) squash blossoms

For the batter
1 cup panko (Asian breadcrumbs)
1 egg, beaten

olive oil (enough to cover the bottom of a small frying pan with a thin layer)
pinch of maldon sea salt
squeeze of lemon

Inspect the inside of the blossoms for insects and remove the inside flower “organs”.

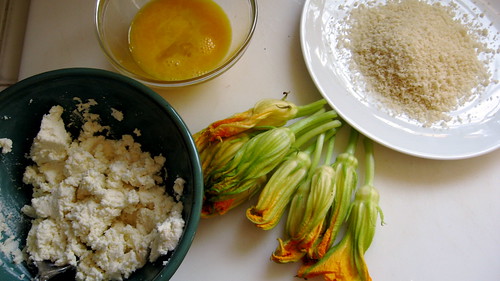
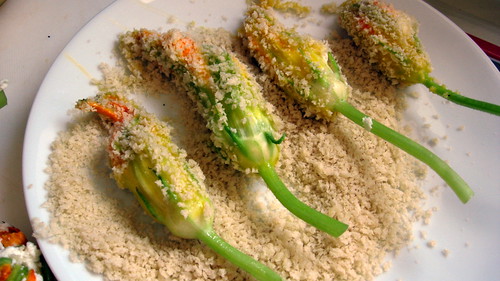
In a small bowl mix together ricotta, salt and freshly grated nutmeg to taste. With either a small spoon or you fingers, stuff the cleaned blossoms with the ricotta mixture. Don’t over stuff, be sure to put in just enough to fill the flower’s belly with ricotta. Twist the ends of the squash flowers to close.

Pour the panko onto a plate. Dip the stuffed squash blossom into the beaten egg (let drip for a second) and then roll onto the breadcrumbs.
Fried Squash Blossoms
After you have breaded your squash blossoms, heat a small frying pan over medium to high heat. Add the oil and let it get hot.

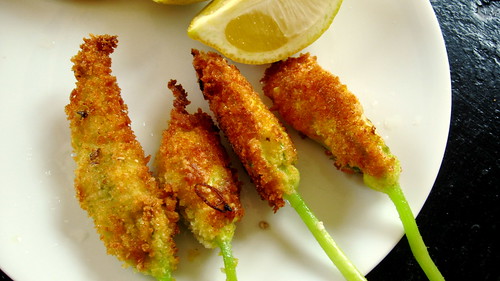
Gently add one squash blossom onto the bed of the pan. Make sure the oil is hot enough to make the flower and breading sizzle. Add just enough squash blossoms to cook them but not overcrowd the pan. Turn the blossoms with tongs when golden on one side—about 4 minutes. Turn until the blossoms are completely golden. Put on a paper napkin to drain of oil.

Put on plate, finish with a squeeze of lemon and a quick pinch of Maldon sea salt. Serve immediately.

Don't fear the egg


The beauty of an egg is its simplicity–simplicity embodied in its elegant shape and intelligent design. Inside the egg, there is a delicate liquid dance of light and dark—a golden orb of yolk suspended in a viscous, protective fluid. Combined, these elements are powerful enough to support a life. In the hands of skilled chef, the egg is the center point of a meal or the central ingredient behind rich sauces or a delicate soufflé.

Up until recently, I feared the egg.

My fear wasn’t based on science, agricultural politics, or some kind of bizarre food phobia. No, my fear was based on the power of one single cooked egg to confirm (or disprove, in my case) my level of skill in the kitchen.

If I can conquer all sorts of culinary challenges, my thought process would go, how is it an EGG can thwart me?

It an embarrassing thing for a food writer to admit, being afraid of cooking eggs. I mean, after years of cooking, brining, roasting, fish gutting and baking, I should have long ago gotten over this fear of an egg-centered breakfast. Granted, I kept my fear in the closet for years after mastering egg poaching, just so I could continue on living like a perfectly normal, food-obsessed woman in the kitchen. And now, after years of quiet observing and coaching (Thanks husband!), I am now happy to report I can now cook scrambled and sunny-side up eggs as well as fluffy omelets without breaking into a sort of culinary panic attack.

But for anyone like me that still may secretly fear they might undo any culinary status they’ve built up with friends and family by making a terrible egg dish, I offer the following fool proof dish that will wow any breakfast guest. This, by the way, also makes a great lunch when the cabinets and fridge are nearly bare. Oh, and feel free to increase the recipe, depending on how many guests you plan to impress!


EGGS AL FORNO
Serves one

One monkey dish (small, 5 to 6” cassarole dish with “ears”)
One egg (or two if you like)
1 piece of bread from a rustic loaf (or baguette), cut to fit the dish
1 handful of a good cheese (fontina, perrano, or any medium bodied cheese), cubed
1 generous sprinkling of freshly grated parmesean (1/3 cup)
a healthy pinch of chopped sweet onion (or green onion, or chives)
a touch of olive oil (1 teaspoon)
salt and pepper

Preheat the oven to piping hot 500 degrees. Put the piece of bread into the dish. Drizzle with a little olive oil. Surround the bread with the cheese cubes and parmesean. Add a healthy pinch of sweet onion around the bread. Crack the egg and lay it on top of the bread. Season with salt and pepper. Grate a tiny bit more parmesan over the egg. Bake on the middle rack of the oven for 7 minutes, or until done.

Be very careful taking the baking dish from the oven! Place a folded cloth napkin on your plate before serving. For bacon lovers, a piece of fried bacon on top would be a perfect way to garnish the dish!

A master comments…

After getting over a bit of performance anxiety, I brought my butternut squash dish to work to be critiqued by the chefs at the restaurant I worked at.  I did my best to appear cool and calm and slid the plastic to-go container holding the contents of my labors to the chef.

“Here’s that butternut squash dish I’ve been obsessing over,” I said with studied nonchalance. “Heat it up whenever you think you have the time.”

I started to walk away. Chef Bryant stopped me as I turned to leave.

“Hold up. We’re gonna eat it now.”

I quickly gave him my re-heating instructions and disappeared around a corner. I was hoping to see if Nancy Silverton, my boss and my culinary hero, was somewhere nearby. I scanned the back kitchen.  The only people I could find were the dishwashers and some cooks prepping clams.

For a moment I considered slicing off a portion of sizzling butternut squash and bubbling Pecorino and bringing it to her, but changed my mind.  I feared I’d look foolish or inconsiderate forcing a nugget of orange squash on the city’s most celebrated bread bakers. With just minutes before service, surely someone in charge would kill me for distracting Nancy.

So instead, I busied myself with preparing a frothy cappuccino. Anything to keep my hands busy and my eyes off the mouths of the chefs that were most likely eating my dish by now. I downed my caffeinated drink and returned to the floor of the Pizzeria.

One of the chefs, Joe, stopped me as I passed by. “ Hey–it’s good,” he said.

I stopped in my tracks. I couldn’t stem the rising of octaves in my voice. I practically sang a high-soprano “Really?”

“It could use a little salt. But it’s good.” He smiled. Continue reading “A master comments…”